0:00
Back again to show you kind of a different design for me. I've been working a lot lately with
0:06
acrylics and abstracts and joint compounds so textured wall art type things and so in sharing
0:16
some of that on Instagram I had somebody in my community reach out and ask me if I thought that
0:23
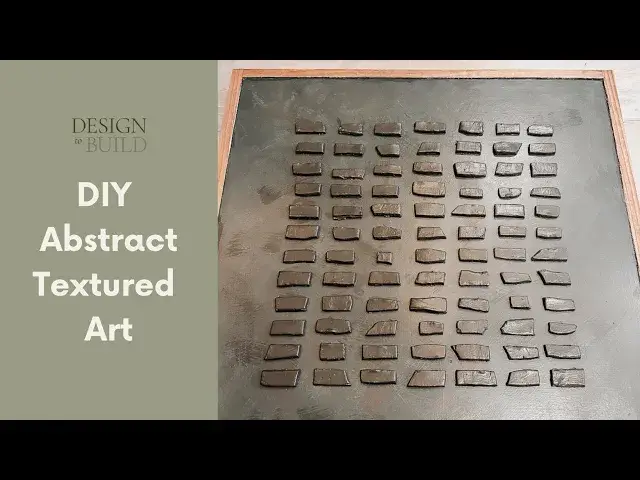
I could build something like this or put together a piece like this and so I was up for the challenge
0:30
So in that process I had to figure out like how to make these pieces stuck onto the canvas so
0:37
there's actually like texture there that adds dimension to it for sure and had to kind of figure
0:43
out how to how to make those so that was probably the trickiest part of the whole thing is how do I
0:49
create those those tiles and so I figured it out I then added the frame to it which is just took
0:57
some one-bys and nail gun them straight into my canvas so again a very easy DIY
1:07
Here's the beautiful textured wall art that I was asked to make. Always up for a challenge I
1:14
decided to use this piece that used to be in my daughter's room and was no longer being used
1:20
Not needing very much paint I picked up paint samples from Sherwin-Williams in these colors
1:26
ripe olive, pewter green, and enduring browns. The first step is to decide where you want to place
1:34
your raised rectangles. To determine where I wanted my cubes or my rectangles to be I measured off a
1:42
square in the middle of the canvas and then marked it using painter's tape. If you're wanting to make
1:48
your square the same size as mine my canvas is 25 by 25 and I marked off a space of 16 by 16
1:58
Now you're ready to make your clay rectangles. I used air dry clay for this and I molded rectangles
2:04
to fit inside my painter's tape square. I chose to place seven tiles across and I just kind of
2:10
varied them in size. Just for reference my biggest tile was two inches long and three quarter inches
2:17
wide and my smallest tile is one inch long and three quarter inches wide and the thickness of
2:24
most of my tiles are about 1 eighth inch. That just kind of gives you some guidance but truly just have
2:30
fun with it and you really can't mess it up. To make my tiles I used a block of wood to flatten
2:36
out the clay and then a pizza cutter to cut my tiles into rectangle shapes. Once I had my tiles
2:44
all cut and laid out I just let them sit for a couple days so that they could dry out
2:52
Once your clay tiles are dried out you can go ahead and put those off to the side put them in a bowl
2:58
and let them sit for a little bit and we're going to move on to the priming. So we're going to go
3:03
ahead and paint primer two coats onto our canvas or if you don't have primer you can use white paint
3:11
Once the primer is dry we're going to move on to the fun part of this project we're going to
3:15
lime wash. Lime wash is actually very easy so don't let the name scare you away. What we're
3:21
going to do first is we're going to go ahead and divide our paint tray into two sections
3:26
I simply cut and stacked some cardboard strips to create a divider down the middle of my paint
3:31
tray and then I attached them to my tray using painter's tape. I then poured my Sherwin-Williams
3:38
ripe olive paint on one side of the divider and my peter green paint on the other side of the
3:44
divider. Once you have your paint colors in the tray and your paintbrush is ready you're going to
3:49
also need a bowl of water. Okay and now we're finally ready to paint. We're going to dip our
3:54
paintbrush in the bowl of water and then dab it on a paper towel or the side of the bowl. You should
4:00
have very little water on your brush. Then you're going to go ahead and dip half of your paintbrush
4:06
in the left side paint and then the other half of your paintbrush in the right side paint. You should
4:11
now have one paint color on the left side of your brush and the other paint color on the right side
4:17
of your brush. Apply the paintbrush to the canvas creating x's as you paint and you're going to
4:22
start at the top and work your way to the bottom of the canvas painting x's as you go. When the
4:28
paint on your brush becomes too thin just go ahead and dip your brush in the water dab it on
4:33
the napkin and dip half the brush in each paint color again just like we did before and just keep
4:40
repeating these steps until the entire canvas is covered. Okay don't panic I know it looks awful
4:47
but keep going. I promise the more coats you add the better it gets so add another coat and then
4:53
add another coat and just keep doing that until you get the look you desire. As a side note be
5:00
sure to let the canvas dry between each coat. For my canvas after each coat I loved it a little more
5:07
but it took about four coats until I really really loved it. To add even more depth and a little bit
5:13
of contrast I went ahead and dry brushed Sherwin Williams Enduring Bronze sparingly across the
5:19
canvas. I love the different colors of my abstract painting it's just gives it more depth that gives
5:26
it more texture. Honestly if I just stopped here and I didn't add anything else it would look great
5:33
on my walls but I kept going and I added the clay tiles next. I went back and forth on what color to
5:39
paint my tiles. In the beginning I thought I wanted them to stand out more so I painted them a
5:44
contrasting color. In the end I really didn't care for the contrasting look so I went ahead and went
5:50
with a monochromatic look and I was in love. That was what I was looking for. After painting all of
5:57
the tiles pewter green I laid them out how I wanted them and my last step was finally to attach the
6:03
tiles. I didn't have any other glue on hand except for wood glue so that was my really my only option
6:09
so I went ahead and used that and I applied a thin layer of glue to each tile and placed it in
6:14
its spot and actually the wood glue worked perfectly. Once the glue was dry which took about
6:20
two to three hours I was ready to hang my beautiful DIY textured wall art. I spend so much money on
6:26
artwork from the big designer stores when you can actually just create your own DIY blank canvas on
6:32
an old canvas that needs a change. I hope you found this tutorial to be helpful and that you'll hit
6:38
that like button and subscribe for more great content