0:00
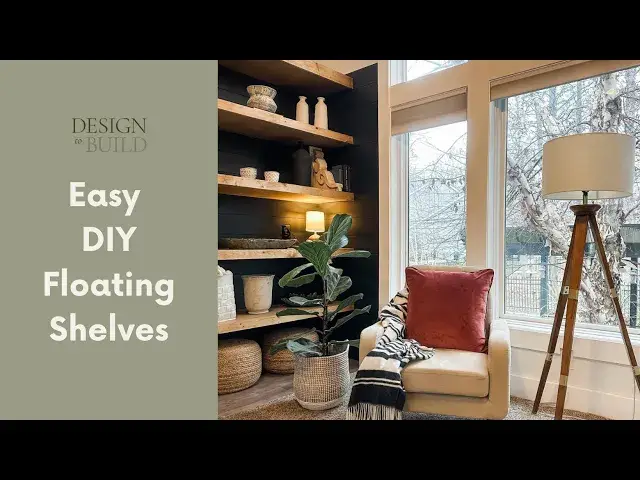
Hello and welcome back to my channel. Today I'm sharing these floating shelves. This space looked
0:06
completely different than what it does now. It used to have a built-in
0:11
corner cabinet thing going on. Definitely a early 2000s design where our TV would be in there and it was like a big tube TV
0:22
So it took up a lot of space. In remodeling our living room, I
0:27
decided that that needed to go. So it did not fit with the rest of the
0:32
vibe of the room. And so I added the horizontal shiplap, painted it all black, and I added these floating shelves
0:43
I ripped out the corner cabinet completely and added the floating shelves
0:47
So if you have a space like that that you're looking to bring up to date, I think this would be a great idea for that
0:55
It provides a lot more options for decorating and maybe even storage. We store some blankets in here and
1:02
we have some poofs down at the bottom that we pull out when we have a lot of people over. It's a great
1:10
addition to our living room. It's a very easy build. I will say that floating shelves have always
1:16
kind of intimidated me before I ever built them because I was like, how do you get those things to really stay in place and
1:23
make them sturdy? It is an easy build though. Once you figure out the
1:27
mechanics of it and how it actually happens, it's just 2x4s that you're putting
1:34
into studs. You're building 2x4s off of that and then you're wrapping those 2x4s with your plywood
1:42
I faced mine with a 1x to give it just a nicer look on the very very front
1:49
It truly is that easy. Definitely a simple build. Now would be a good time to hit that like button and subscribe
1:59
Here's a quick peek at that corner cabinet before I tore it out
2:04
Look at all of that space that freed up. First I cut all of my 2x4s down to 2x3s
2:12
If you don't have a table saw or a circular saw, you can skip this step and just use 2x4s
2:19
For one 61 inch long floating shelf, you're going to cut five
2:24
2x4s at 17 1⁄2 inches each. Then you're going to drill 1 1⁄2 inch pocket holes into one end of each of these 2x4s
2:36
These are called your cleats. Now you're ready to cut your stretcher. Cut a 2x4 to 61 inches
2:44
Attach the five cleats to the stretcher using 2 1⁄2 inch pocket hole screws. Space the cleats out
2:52
approximately 12 inches from one another. You'll only have one of these if you're making one floating shelf
2:59
However, I was making five floating shelves for next to my fireplace
3:03
If you're hanging multiple shelves like I was, you're going to want to figure out the spacing between each shelf
3:09
I found it easiest to cut scrap wood and use them as
3:14
spacers so that I didn't have to fight against gravity for my shelves
3:19
Using your spacers to set the support on, you're going to work your way up the wall
3:25
Attach each support with 2 1⁄2 inch wood screws. Make sure that you're attaching your screws into the wall studs
3:32
Be sure to use a level to ensure each support is straight. As you can see in this video
3:38
I'm using the spacers as guides to see where each support is going to be attached
3:45
Here's a look at all five shelf supports attached and ready for plywood to be wrapped around them
3:51
Now you're ready to cut your plywood to fit the top and bottom of each support
3:57
You'll need a table saw or a circular saw for this step
4:03
If you don't have a table saw or a circular saw, Home Depot can make your cuts for you when you purchase your plywood
4:15
Cut your spacers just enough to fit the bottom sheet of plywood to the underside of the support
4:22
Once again, this is to help you work against gravity, and it will make it a lot easier to attach the bottom of the shelf plywood
4:30
while the spacer is holding it up for you. Working your way up the wall, face the top and bottom of each support with plywood cut to fit
4:40
using 1 1⁄2 inch wood screws to attach. Rip 1 by 4 pine boards to cover perfectly the fronts of each support
4:49
While the dimensions of each of these should be very similar, you're going to want to cut them to fit
4:55
This will make sure that you have the exact measurements needed. Working your way up the wall, add a front board to cover each support
5:04
Fill all of your nail holes with wood filler, then run over them with a 220 grit sandpaper block
5:11
And now you're ready for stain. I used Varathane Golden Oak Stain for my floating shelves
5:18
And that's it! Decorate your shelves and step back and admire your handiwork
5:24
Don't forget to ring that bell and subscribe for more great content