

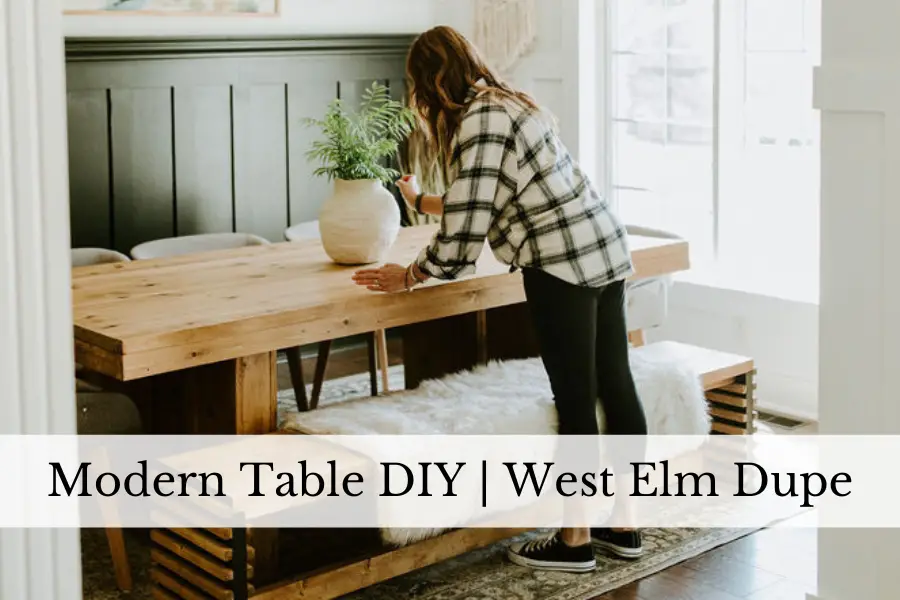
After seeing this modern dining table from West Elm trending all over social media, I knew I had to build one! I absolutely love the straight lines and the solid look of this table. It is exactly the organic modern design I love!
And I can’t wait to share this beautiful build with you, so let’s get to it!

How to Build a Modern Dining Table | West Elm Dupe
(Instructions are based on a 7ft long x 45″ wide; 30″ tall table) If building a different size, be sure to adjust measurements accordingly).
Be sure to watch the DIY West Elm Table Dupe video below. It shows the entire process of how I built this beautiful modern table….
Wood Needed for Modern Dining Table:
TOP:
2x6x8 pine boards (9)
LEGS:
2x4x8 pine boards (6)
1/2″ – 4×8 Plywood sheet (Birch wood or something of good quality is best, if you’re planning to stain your table; If painting, sanded plywood is fine)
APRON
2x4x8 pine boards (3)
SUPPORTS
2X4X8 pine boards (4)
STRETCHER
2X4X8 pine boards (1)
Materials Needed for Modern Dining Table:
- Kreg Jig Screws 2 1/2″
- Wood Glue
- Wood Screws 2 1/2″
- Wood Screws 1 1/2″
- Tape measure
- Sanding pads
- Wood filler
- Stain or paint
- Finish (I.E. paint/stain/poly) (If building for an outdoor space, be sure to use exterior poly)
Here’s a list of the products I used:
- Pre-Stain Wood Conditioner
- Golden Oak Stain
- Satin Polyurethane (For the base)
- General Finishes Polyurethane (Satin) (For the top)
Note: General Finishes Poly is a little more expensive, but provides a super strong protection. I highly recommend it for the table top, since that is the part of the table that will see the most wear and tear.
Tools Needed for Modern Dining Table:
- Miter saw
- Sander
- Drill
- Kreg Jig
- Table saw OR Circular Saw If you don’t have either of these, Home Depot can make your cuts for you.
Affiliate Links Included
NOTE: If you’ve never used a Kreg Jig, here’s a great tutorial. If you don’t have one, I highly recommend buying one. You will use it all the time in the DIY realm! And it makes builds so much easier!
Step One: (OPTIONAL) Rip your boards
This step is completely optional. I like to get rid of the manufactured edge on all of my 2x’s before starting any project. This is very easy, but does require a table saw.
I’ll share the widths I take them to and then explain how I do this…
- For the table top, I rip the nine 2×6’s to 4 7/8″ wide. (2×6’s are actually 5 1/2″ wide)
- For the apron, I rip the three 2×4’s to 2 3/4″ wide. (2×4’s are actually 3 1/2″ wide)
- For the stretcher, I rip the one 2×4 to 2 1/2″ wide.
Now for How I Do This: (Here’s a great post on how I give my boards a finished look)
- I’ll use the table top boards for my example…
- As noted above, I want my 2×6 table top boards to be 4 7/8″ wide. They are originally 5 1/2″ wide.
- I simply set my table saw for 5 1/4″ and rip one side of my 2×6.
- Then I set my table saw to 4 7/8″, flip my board over and rip that side of my board.
- Now I have a 4 7/8″ board with straight edges on both sides.
- Follow these same steps for your other boards, to get rid of that manufactured curved edge and achieve a straight edge look.
Step Two: Build tabletop
Cut nine 2×6’s to 84″.
Drill 2 1/2″ pocket holes down the length of each 2×6 and attach together using large clamps and 2 1/2″ pocket hole screws.
As shown below….

When finished, the underside of your table top will look like this…

Note: No need to drill pocket holes in the last board (as you can see in picture above), since it will not be attached to another board.
Step Three: Build the legs
Cut eight 2×4’s to 25 1/2″
Cut eight 2×4’s to 16″

Drill 1 1/2″ pocket holes on each end of the 25 1/2″ boards.
(Note: In the picture above, it’s hard to see the second set of pocket holes on the other end of the 25 1/2″ board. Be sure to drill pocket holes on BOTH ends of these boards).
Attach 25 1/2″ board to 16″ board using 2 1/2″ pocket hole screws. It should now look like this….

Attach another 25 1/2″ board to the other end of the 16″ board using 2 1/2″ p.h. screws. And now it should look like this….

Complete the rectangle by attaching another 16″ board. Making sure everything is square. See picture below….

Repeat with remaining boards. You will have 4 rectangles (these are the table’s legs) when you are finished….

Want to build the Pottery Barn Brooks Dining Table Dupe? Check out these plans!
Step Four: Build the supports
(These are the boards connecting the legs and providing support for the table top)
Cut four 2×4’s to 54″
Drill 1 1/2″ pocket holes in both ends of each board and three pocket hole groupings, spaced out, along one side of the board.
See picture below for where pockets holes need to be drilled and how many are needed….

Attach supports to legs using 2 1/2″ pocket hole screws.
(NOTE: Make sure pocket holes along the side of each support are facing in the direction of where the table top will be placed. You will be using these pocket holes when attaching the table top, so you want to make sure they’re facing in the right direction to be able to attach the table top.) The legs and supports should now look like this….

The picture below is a zoomed in shot of the above picture and gives further clarification of which direction your pocket holes should be facing…

Step Five: Wrap the legs with plywood
You’re now ready to wrap the legs with plywood. You’ll want to wrap the outside legs and side legs first (as shown below).
Do this by cutting your plywood to fit and screwing it on to the 2×4 legs with 1 1/2″ wood screws. Repeat this with each leg….

Note: You’ll notice in the picture above that I used 1×10 pine wood to wrap my legs. I did this on the first table that I built (I have built a few of these). However, through trial and error, I found it easier to use plywood to wrap the legs. I feel like it looks better too, with no seams.
Before wrapping the inside of the legs, we’re going to attach the stretcher.
Modern Dining Table Step Six: Attach the stretcher
Do this before wrapping the rest of the legs
Cut one 2×4 to 58″. Slide the stretcher between the legs.
A portion of the stretcher will be sticking out on both ends, make sure this is an even amount.
When attached and the table is finished, it will look like this….

Because you’ll be working against gravity here, it helps to prop up the stretcher with a 2×4….

Once it’s propped up and in place, you’re ready to attach it. Using 2 1/2 wood screws, drill through your plywood (as seen in the picture below). Do this on both sides of the stretcher and at the other end of the stretcher too, of course.

Once the stretcher is attached, you are ready to finish wrapping the legs (exactly as you did in Step 4)….

Pro Tip: At this stage, it’s a good idea to move the legs/stretcher to the location of your table’s new home. It’s much easier to move the legs and tabletop separately than together.
This table is solid! And heavy!
Step Seven: Attach tabletop to legs
Place tabletop on top of legs and center.

Centering Your Modern Dining Table
Centering the table top can be a bit tricky. Eyeing it and adjusting until it looks right, is one way to do it.
But if you’re a bit of a perfectionist and you want it to be as perfect as possible, follow these steps…
To find the center of the length of your table:
- Measure length of tabletop and divide by 2.
- Mark this spot as the center of your table top.
- Measure length of legs/supports and divide by 2.
- Mark this spot as center of your legs.
- Line the two lines up to center the length of the table.
- Repeat these steps for the other side of the table and line up those lines too.
To find the center of the width of your table:
- Measure width of table and divide by 2.
- Mark this spot as the center of your table top.
- Measure width of legs/supports and divide by 2.
- Mark this spot as center of your legs.
- Line the two lines up to center the width of the table.
- Repeat these steps for the other end of the table and line up those lines also.
Note: It takes a lot of positioning and repositioning to get the lines to line up all at the same time. Keep working at it, til it’s as close to lined up (center) as possible. (Eyeballing it is key also).
Once the top is centered on the legs, attach the top from underneath. This is where those pocket holes along the sides of your supports come into play.
Attach using 2 1/2″ pocket hole screws. Here’s an underneath view of the table…

Step Eight: Attach apron
Cut the apron to fit the length of the table (both sides). Drill five sets of 2 1/2″ pocket holes, evenly spaced, along one side of each apron….

Clamp apron to underside of table with pocket holes facing up and towards the inside of the table…

Attach to underside of table using 2 1/2″ pocket hole screws….

Once the side apron boards are attached, cut the end apron boards to fit and repeat the above apron steps. It will look like this when finished….

All said and done, the apron will look like this…

Modern Dining Table Step Nine: Sand and finish
Sanding is such an important step of every furniture build. Not only to get that smooth-to-the-touch finish, but also to bring out the natural color of the wood.
You can see the difference in the picture below from where I’ve sanded and still need to sand.
Notice how all of the yellow is gone where I’ve already sanded? So much better!

There is also a process to sanding.
I like to sand in the following order: 60-grit; 120-grit; 180-grit; 240-grit.
Using each of these grits in this order and blowing off your project (I use a leaf blower) between each grit, will give you a super smooth furniture finish.
Check out this full tutorial on how to properly sand furniture.
Now you’re ready to stain your modern dining table.
For my table, I chose Varathane Golden Oak Stain.
Once dry, I used Varathane Satin Poly for the legs and stretcher (2 coats).
And General Finishes High Performance Poly for the tabletop (4 coats). I love this Poly! It is very durable and holds up great with kids and all the wear and tear a dining table goes through…

Once again, this table is solid!
If you haven’t already moved it to it’s new home, I highly recommend moving it in two pieces (by taking the tabletop off).
I found it helpful to mark clearly (from the underneath of the table top) where it attaches to the legs, before removing the tabletop. Much easier to line up when set in its new place than having to center everything again.
We love our new modern dining table! What a statement it makes in our dining room!
And what a savings building it myself. The price tag on this table in the store was over $3000. Total cost to build it myself? Just over $200. A fraction of the price.
Well worth the time. And I always love being able to say, I built that!

I have since changed up that light. You can find the plans for the light here….
And the bench to match is the perfect finished touch. Here are the plans for the bench to match! It’s the perfect size for this table.
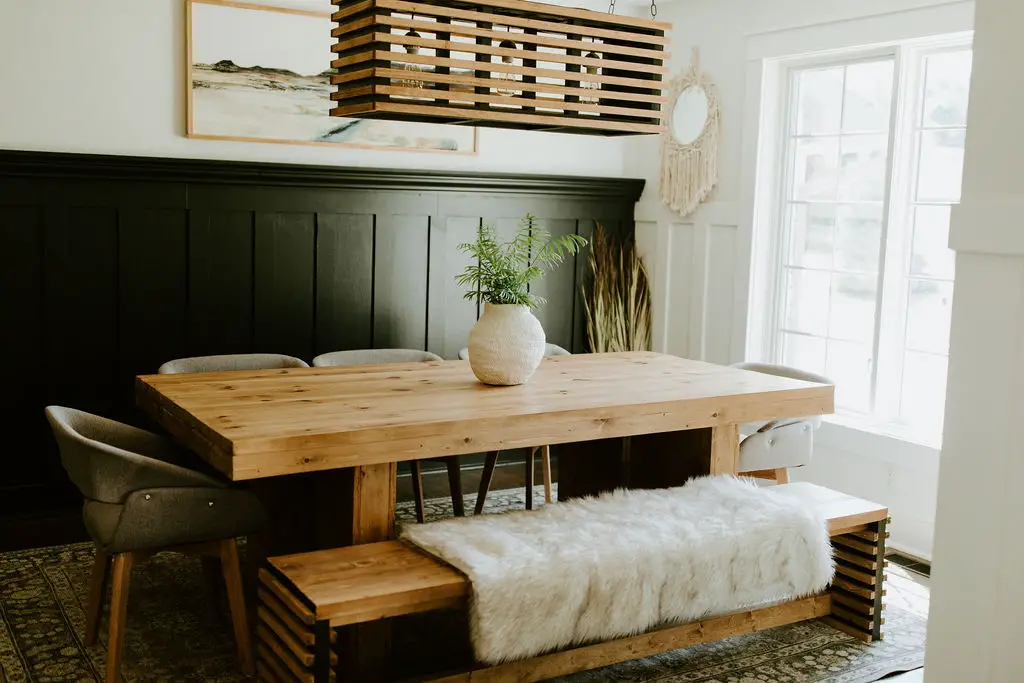
The contrast of the fabric accent chairs I chose for our wooden table adds texture and warmth. Here’s the link, if you want to check them out. The price range on them is really good!
Amazon Affiliate Links Included
Building a beautiful dining table isn’t as hard as you might think. Just follow these simple plans and you’ll have a modern style, West Elm table dupe in no time.
Designer Tip: When It Might Be Time to Bring in Help
If you’re working on your home and things still don’t feel quite right, you’re not alone. Many of our clients start exactly where you are now. They’ve gathered ideas, saved inspiration photos, and maybe even purchased a few pieces, but the space still doesn’t feel cohesive. That’s often the moment when having a designer can make all the difference. We help homeowners create a clear plan so every decision works together. From layout and furniture placement to finishes and lighting, the goal is a space that feels thoughtful, comfortable, and complete.
If you’d like a little guidance with your space, you can learn more about our interior design services below.
Explore Interior Design Services
Planning a kitchen, living room, or full home project? Start with a quick discovery call to see if we’re a good fit.
Let’s go beyond the design to build something beautiful together!
Until next week,
Happy Building, Friend!!
Don’t forget to join my VIP List below for many more great tutorials.
Hop over to Instagram to see all of the D2B behind the scenes. What am I working on now?….come check it out!
More Great D2B Table Posts:
Easy How to Make a Console Table with Hemp Rope
Easy DIY McGee & Co. Dupe DIY Coffee Table
Easy How to Make a DIY Fluted Side Table
Oh Nicole, It is so beautiful! You were made to do videos so keep them coming. You’re amazing and so good at what you do!!
Nancy
I don’t see what this project cost, can you share?
Hi Kaela,
Great question. I added this information to the post. The cost is approximately $150 for this project.
Have a great week!
~Nicole