

Modern outdoor chairs! These sturdy and heavy-duty chairs are great for a patio or deck!
This is my spot! Where you’ll find me all summer long. Hanging out in my modern outdoor chair. The most comfortable spot on my deck.
Looking at starting some outdoor projects this weekend? Be sure to add this one to your list.
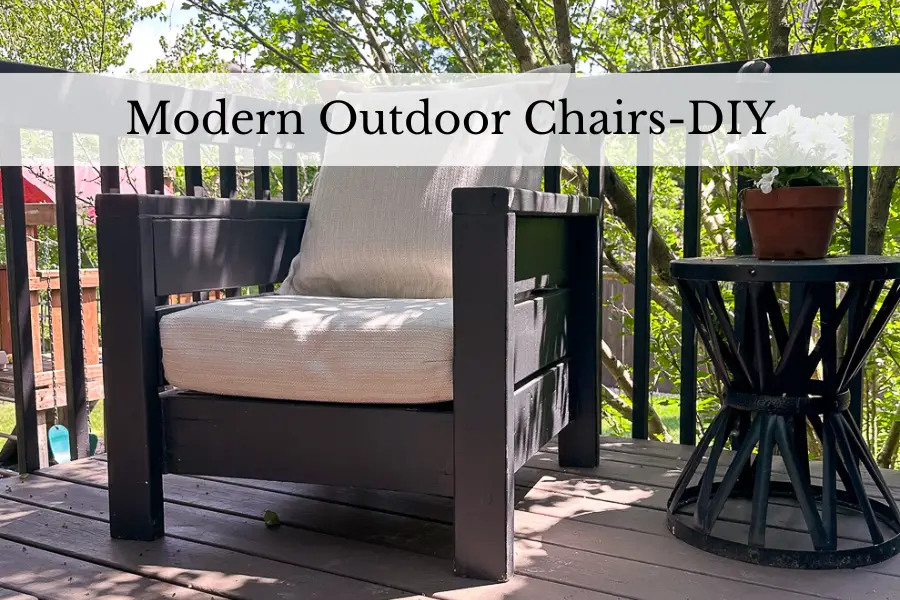
Let’s head over to Home Depot, pick up the wood we need and build 2 modern outdoor chairs. Guaranteed to be one of the easiest DIY projects you’ve ever done.
And the best part!?? Building your own DIY outdoor chairs is a heck of a lot cheaper than buying them in the store. Coming in at less than $75 for TWO chairs! That’s a steal!!
Because of its simplicity and functionality….every summer, these modern chair build plans are one of my most popular.
Did I mention they’re an easy build? Haha! Did I also mention, they’re a solid build? No worries when the winds pick up, these chairs aren’t going anywhere.
Alright, let’s follow my free plans below and get started!

Want the warm soft blanket above? Here’s the link!
How to Build Modern Outdoor Chairs
Before we jump into the step-by-step directions, let’s talk about a couple important details.
- The wood we’re going to use
- And the cushions I chose for my chairs
The Type of Wood I Choose for All of My Builds
I built my first pair of outdoor chairs a few summers ago and am happy to say they have held up great! To withstand northern Indiana winter weather, speaks volumes to their durability.
I might get some frowns from you “true” woodworkers out there, but I use Pine wood for all of my outdoor furniture builds. Why?
- I’m not patient! I can’t wait the recommended time to hold off on paint or stain. I want it done NOW!
- It’s cheaper than treated wood. And much much much cheaper than the extra cost of specialty wood….Like Cedar or Teak, for example.
So, how do I ensure it will hold up to the outdoor elements? Poly! Poly! Poly! I use a good quality poly (3-4 coats) and have had great success in durability.
Be sure to check out My Featured Video…
My favorite polyurethane is General Finishes High Performance Topcoat. (It is a bit on the spend-y side, but the quality makes up for the cost).
Oftentimes though, my go-to is Varathane Satin Exterior Poly. And if you want the best of both worlds: Apply 2-3 coats of Varathane first and make your last coat General Finishes.
That will set your mind at ease and your furniture will hold up great outdoors.
Another key to making sure my outdoor furniture lasts for years to come? We cover them every winter with these outdoor waterproof covers.
As for paint….totally up to you! If you have a good poly, you can choose whatever paint you like. :)
I chose Rustoleum Linen White Chalk Paint for my modern outdoor chairs…(Amazon Affiliate Links)
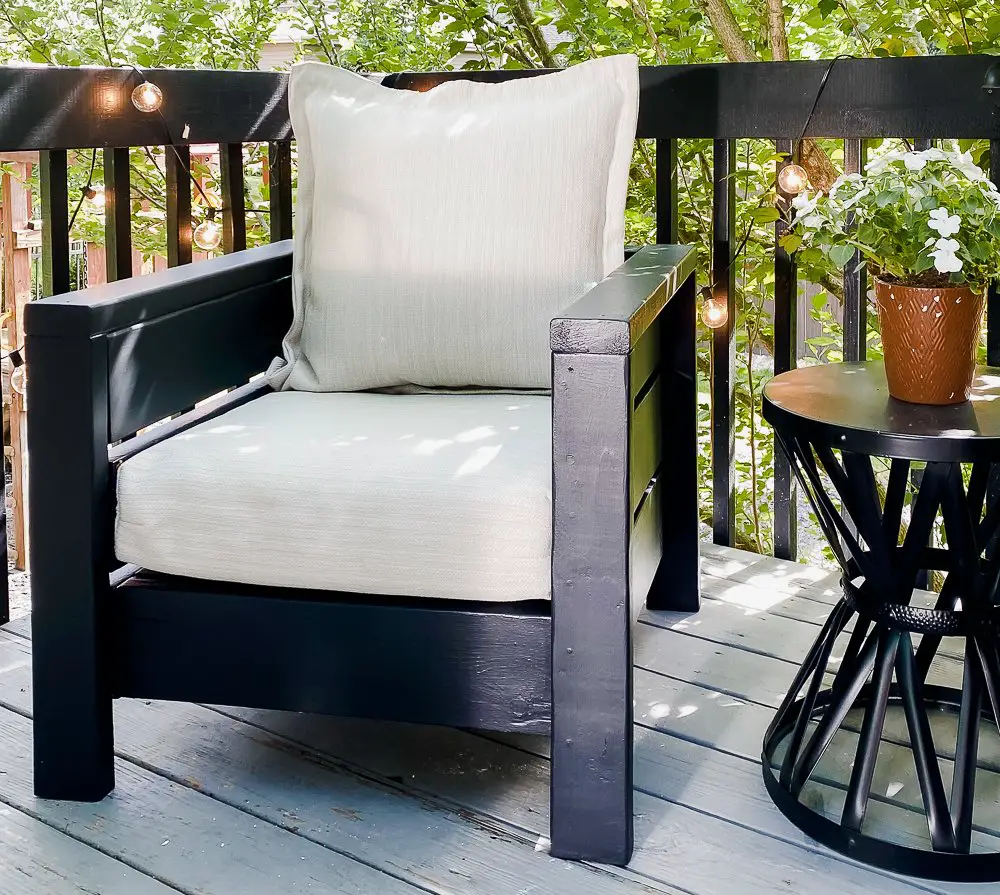
But I have since painted them black…Sherwin Williams Black Magic, to be specific…
Choosing the Right Outdoor Cushions
When looking at seat cushion options, we need to consider three key factors:
- Size
- Durability
- Price
Size of Cushions for Modern Outdoor Chairs
You’ll need a standard size cushion for these chairs….22″ x 24″.
Durability & Price Matters
While I would love to purchase all of my cushions through Sunbrella, they are more than I want to spend. Great quality, but a pretty penny!
So, instead I bought all of my cushions for my outdoor furniture at Target. They typically have a good selection. And the price point is good too.
Not to mention, they hold up well. We’re in our fourth year of using these outdoor cushions and they’re still firm. Not broken down at all. I’m happy with that!
Note: As you can see in the picture above, the cushions now have new coverings on them. While they are the same cushions as the ones in the picture below, I wanted a new look.
I had a local Amish gal change them up for me. I love the new neutral color. Especially with the black wooden chairs.

Alright, let’s get on with the step-by-step process of this build…
As I mentioned before, these chairs fit 22×24 cushions. Here’s a link to the ones I like.
Seat of chair sits at 11.5″ tall WITHOUT the 6.5″ thick cushion added.
Wood Needed (to build two chairs):
- 4 – 2x4x10 pine wood boards
- 2 – 2x4x8 pine wood boards
- 6 – 2x6x8 pine wood boards
- 1 – 2x2x8 pine wood boards
Materials Needed:
- Wood Glue
- 2 1/2′ Wood Screws or Deck Screws
- Wood Filler
- Paint or stain
- Outdoor Poly
Tools Needed:
- Miter saw
- Tape measure
- Sander
- Drill
- Circular saw or Table saw (OPTIONAL)
(Amazon Affiliate Links Included)
Important Note: Plans are based on TWO chairs being built
Step One: Rip your boards (Optional)
This step is completely optional. I like to get rid of the manufactured edge on all of my 2x’s before starting any project. It’s the secret sauce to building furniture that looks like it’s straight out of a designer store.
A game-changer, for sure.
While it is a very easy process, it does require a table saw. I’ll share the width I’m ripping my boards down to for this project and then explain how I do this…
All of my 2×4’s will be ripped down to 3 inches. (Originally a 2×4 is 3 1/2″ wide)
And all of my 2×6’s will be ripped down to 5 inches. (Originally a 2×6 is 5 1/2″ wide)
Now for How I Do This: (Here’s a great post on how I give my boards this finished look)
Let’s use the 2×4’s for our example….I want all of my 2×4 boards to be 3″ wide. (Once again, originally a 2×4 is 3 1/2″ wide).
- I simply set my table saw for 3 1/4″ and rip one side of my 2×4.
- Then I set my table saw to 3″, flip my board over and rip that side of my board.
- Now I have a 3″ board with straight edges on both sides.
I’ll do the same thing for my 2×6’s:
I want them at 5″ wide:
- I simply set my table saw for 5 1/4″ and rip one side of my 2×6.
- Then I set my table saw to 5″, flip my board over and rip that side of my board.
- Now I have a 5″ board with straight edges on both sides.
This extra step gets rid of that manufactured curved edge and achieves a straight edge, finished look.
Note: You may notice that I did not take the time to get rid of the manufactured edge on this project. If I make these chairs again, I will be sure to not skip this step. It truly does make a difference in the overall look of your furniture.
Step Two: Make all of your cuts
First, I made my cuts…

Cut List:
Note: It’s a good idea to mark each board as you go. Or keep them in their own separate stacks, so you can easily grab them, without having to search for each board.
- 8 – 2×4’s @ 22 1/4″ (Legs)
- 12 – 2×6’s @ 25 1/2″ (Side Slats)
- 4 – 2×4’s @ 28 1/2″ (Arm Rests)
- 8 – 2×6’s @ 22″ (Front and Back Slats)
- 2 – 2×4’s @ 22″ (Top of Back)
- 4 – 2×2’s @ 22 1/2″ (Inside Cleats)
- 10 – 2×4’s @ 22″ (Seat Slats)
Step Three: Build side pieces
Using your drill and 2 1/2″ wood screws, attach 3 side slats into each leg (as shown below). I used a 3/4″ scrap piece of wood in between each slat to keep them evenly separated….

- Side slats will be flush with back of 2×4 legs.
- Top side slat will be flush with top of leg pieces.
You should now have one side piece that looks like this…

Repeat this step four times for 2 chairs…

Step Four: Add arm rest
Attach 2×4 arm rest onto each leg, using 2 1/2″ wood screws. As shown below….

Step Five: Build back of the chair
Using a 3/4″ thick scrap piece of wood to balance each slat, attach each of your 2×6 back slats (3 of them) to each chair…

These should be flush to the end of the side slat boards (as shown below). Use 2 1/2″ wood screws to attach.

Use a clamp to keep your boards tight. My clamps belonged to my grandfather back in the day, therefore, I was unable to link the exact same ones. However, here’s one very similar. And here’s one a little less expensive, but will still get the job done. (Amazon Affiliate Links)
Step Six: Add front piece (front slat)
Flip chair over and use board to balance: attach front piece (front slat), flush with bottom side slat…

Flipped back over, upright…Here’s a view of what the front of the chair should look like now…

Step Seven: Add seat base supports
Attach 2×2’s (inside cleats) at the top of the bottom side slat 2×6 (as shown in the two pictures below). The easiest way to do this is to turn the chair over on its side and attach the 2×2, using 2 1/2″ wood screws.
Then flip to the other side and attach the other 2×2. This provides a support for your seat slats to sit on….

Here’s another view of the seat frame with the seat base supports added…

Step Eight: Add seat slats
Attach five 2×4 seat slats to your seat slat supports you attached in step 7. Evenly separate each one.
AND add 2×4 (top of back). (See “Cut List” above for reference)….

Step Nine: Finishing Touches
There you have it! Two modern outdoor chairs. For our last step, we need to add the finishing touches…
- Fill all of the screw holes with wood filler.
- Sand the entire furniture piece down. (Here’s a great tutorial on how to get a smooth furniture finish)
- Stain or paint your desired color.
- Apply 3-4 coats of poly
- Place chairs in their new home.
- Add cushions
- Step back and admire your beautiful outdoor space. :)

WANT TO BUILD AN OUTDOOR SOFA?? HERE ARE THE PLANS!!
Perfect for entertaining or that coveted quiet morning time…

And the best part–so affordable.

And for fun–a view of my new chair from a nighttime angle…

And one more peek at what my chairs look like now. I love the modern look of that black!

Have you found the perfect place for your new outdoor chairs or have you added this to your upcoming projects list? Either way, I hope you found these modern outdoor chair plans to be helpful.
Look for a more in-depth tutorial coming soon on my YouTube Channel.
Designer Tip: When It Might Be Time to Bring in Help
If you’re working on your home and things still don’t feel quite right, you’re not alone. Many of our clients start exactly where you are now. They’ve gathered ideas, saved inspiration photos, and maybe even purchased a few pieces, but the space still doesn’t feel cohesive. That’s often the moment when having a designer can make all the difference. We help homeowners create a clear plan so every decision works together. From layout and furniture placement to finishes and lighting, the goal is a space that feels thoughtful, comfortable, and complete.
If you’d like a little guidance with your space, you can learn more about our interior design services below.
Explore Interior Design Services
Planning a kitchen, living room, or full home project? Start with a quick discovery call to see if we’re a good fit.
Until next time,
Happy Building, Friend!!
Be sure to join my VIP List below and never miss an upcoming post.
More great modern outdoor furniture building plans:

Absolutely beautiful Nicole!
You are so talented. I just love it!
Thank you Nancy!!
These look great! Thanks for sharing!
Thank you!!
Hi, could you suggest the wood type used and the painting recommendations for this..??
Sure! I use pine for all of my outdoor projects. I then add 3-4 coats of exterior poly, which helps it to withstand the outside elements. This has worked very well for me over the years. The key is to use a good poly. I like General Finishes Topcoat. But have also had great results with Varathane Poly too. On this product, I used Behr Marquee Ultra Pure White paint and Varathane Satin Exterior Poly. Hope this helps. :)
Love, love, LOVE the simplicity of these chairs (and of course, their sturdiness). I am NOT a fan of the Adirondack style and much prefer a straight back. Thank you for sharing this and all your other wonderful projects. You’ve provided so much inspiration to go along with the perspiration haha. Many blessings to you and your family. :-)
Hi Carole
Thank you! I’m so glad you found the plans to be helpful. I love these chairs too! So comfortable and solid!!
Blessings to you and your family too. :)
Nicole – planning to build a set of these, the design is great and the steps are easy to follow…nicely done!!
Curious if you primed before painting with the Linen White Chalk?