

When I finally decided to turn our guest room/catch-all room into my home office, I knew one thing for sure. One wall was going to demand attention. A focal point DIY moulding accent wall.
I love a good accent wall and this was one I had been wanting to design for a while now. My goal for this room was a dark and moody, luxurious feel. And this accent wall was sure to fit that bill.

As I do with most of my room makeovers, the first thing I did was garner Pinterest for ideas. After pinning several design types that I loved, I went to the drawing board and drew my own wall design.
I am very much a visual person and need to see it on paper before I dive in and get to work. Here’s what I came up with…

DIY Moulding Accent Wall Tutorial
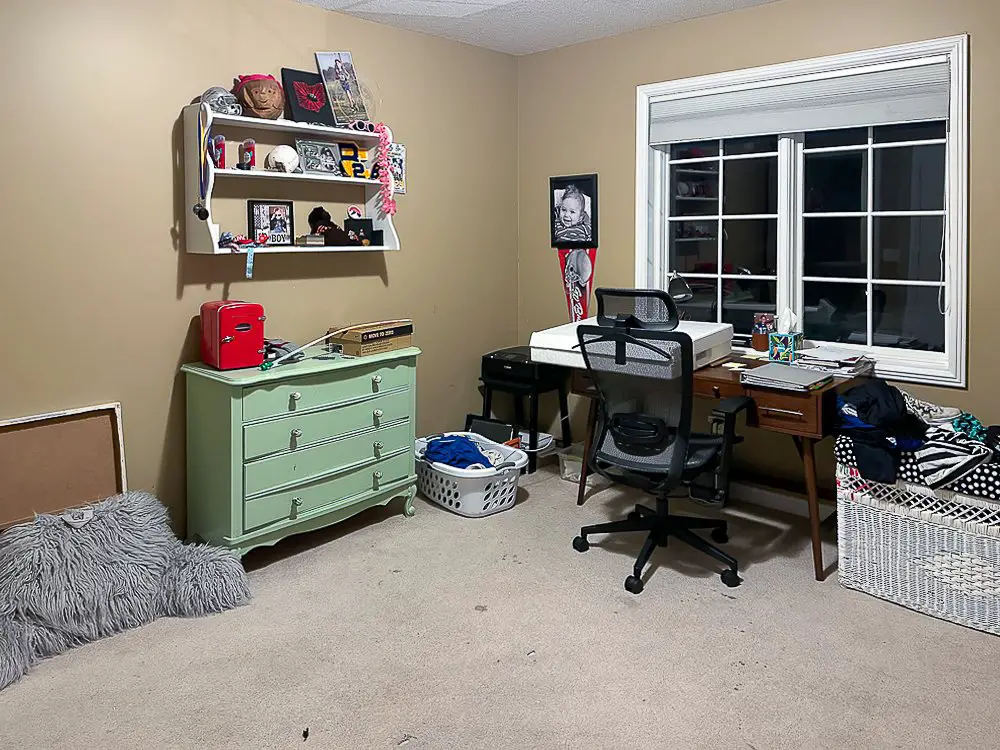
Before we dive in, I feel like it’s well worth it to take a look at this room before this makeover. We had been using this room as a guest room, home office, and catch-all room for quite some time. It was well past time for a change! Here’s what it looked like before…
And now, take a look at the transformation…
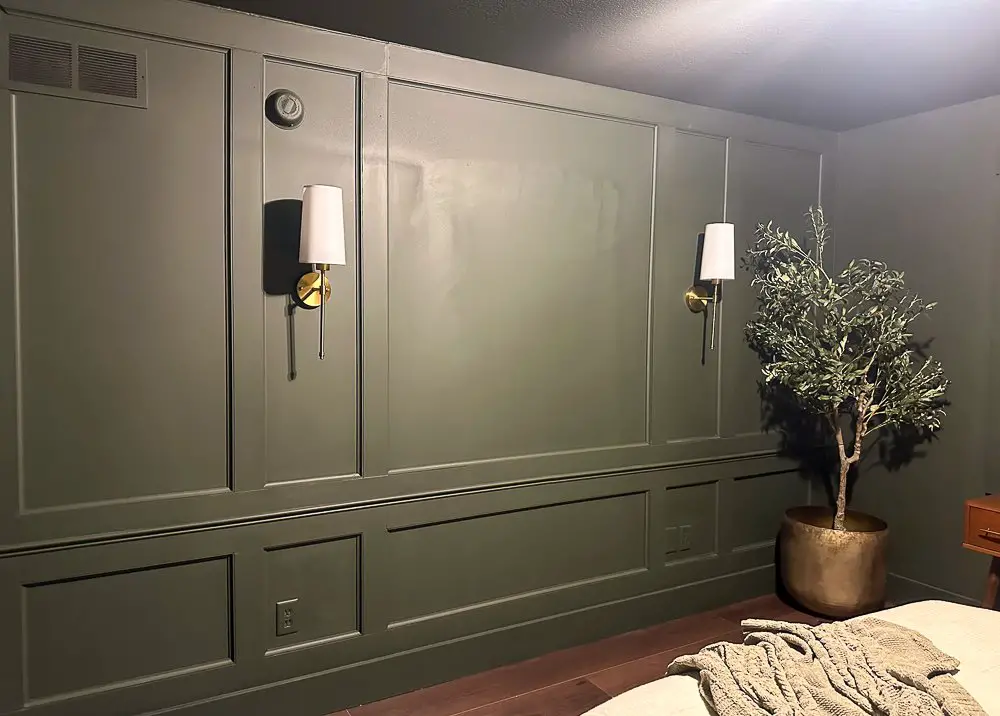
Isn’t that incredible?!! After ripping out all of that old carpet this DIY moulding accent wall was the first huge change to take place in here. No sooner did the boards start to go on and I was already in love!
Alright! Let’s get to the step-by-step process of how to create this millwork accent wall.
The amount of supplies needed will vary depending on the dimensions of your wall. My wall measurements are:
- Length: 151 inches
- Height: 96 inches
Materials Needed for DIY Moulding Accent Wall
- MDF board (3/4″ thick 4ft x 8ft sheet) (Number of sheets needed is dependent upon the size of wall).
- Cove Moulding (Here’s the kind I used) (How much is needed is dependent on size of wall)
Supplies Needed
- Paint
- Sandpaper
- Caulk
- Wood filler
- Putty knife
- Measuring tape
- Level or Laser Level
Tools Needed for DIY Moulding Accent Wall
- Miter saw
- Nail gun
- Finishing nails
(Amazon Affiliate Links Included)
Step One: Plan it Out
Before we hit the drawing board and come up with the design, we need to measure it out. The very first step is to measure the entire wall.
Here are the measurements/details you’ll need to take note of, along with the dimensions of my wall…
- Height of the wall…96 inches
- Length of the wall…151 inches
- How many boxes do you want? I decided on 5 on the top; 5 on the bottom
- How wide will the trim be between each box? My MDF trim pieces are 3 1/2″. Adding the cove moulding to each side, makes each trim piece 5″ wide.
- How wide is the baseboard? 6 inches
- How wide is the ceiling moulding? 4 1/2 inches
At this point, we don’t need to worry about the measurement of each box. We’ll get to that in a moment. Right now, we have our rough drawing on paper and we’re ready to start attaching some boards. Let’s do that in the next step.
Step Two: Make an Outline
The very first board we’re going to attach is our bottom board. We will have two long horizontal boards on the bottom of the wall.
- The first board will be part of the outline of our accent wall.
- The second board will be the baseboard
I ripped my first board 10 inches wide. And cut it to fit the full length of my wall (151 inches). I, of course, had to cut two of these 10″ wide boards to get the full length of my wall.
Butting these horizontal pieces up against one another, I attached my bottom board using my nail gun and 1 1/2″ nail gun nails.
As you can see, I used 2x boards to prop up my MDF boards. I did this so that my flooring could slide underneath my boards.
Also, because floors are never even and I wanted these boards to be even. I used a level to ensure it was even all the way across. This first piece must be level, so as not to throw off your entire project.

Note: My reason for ripping this bottom board to 10″ was because my baseboard is 6″. This leaves 4″ still visible, keeping it uniform with the outline of my project. (I’ll attach my baseboard later on in the project).
Once I had that board attached, I was ready to attach my side vertical boards. I ripped these MDF boards to 4 1/2″ wide and cut them to fit the full wall height minus the bottom board.

Not far into the project, and I already had to bust out my jigsaw to cut around that vent.
You can see I also left room on the left side of my board for the trim around the door. These are all things you most likely won’t need to do if you’re only doing the accent wall and not replacing all of the trim in the entire room.
Once both vertical boards were in place, I was ready to attach the top board. This was ripped to 4 inches wide (same width visible on the bottom board) and cut to fit the length of the wall.
The wall should now look like this…
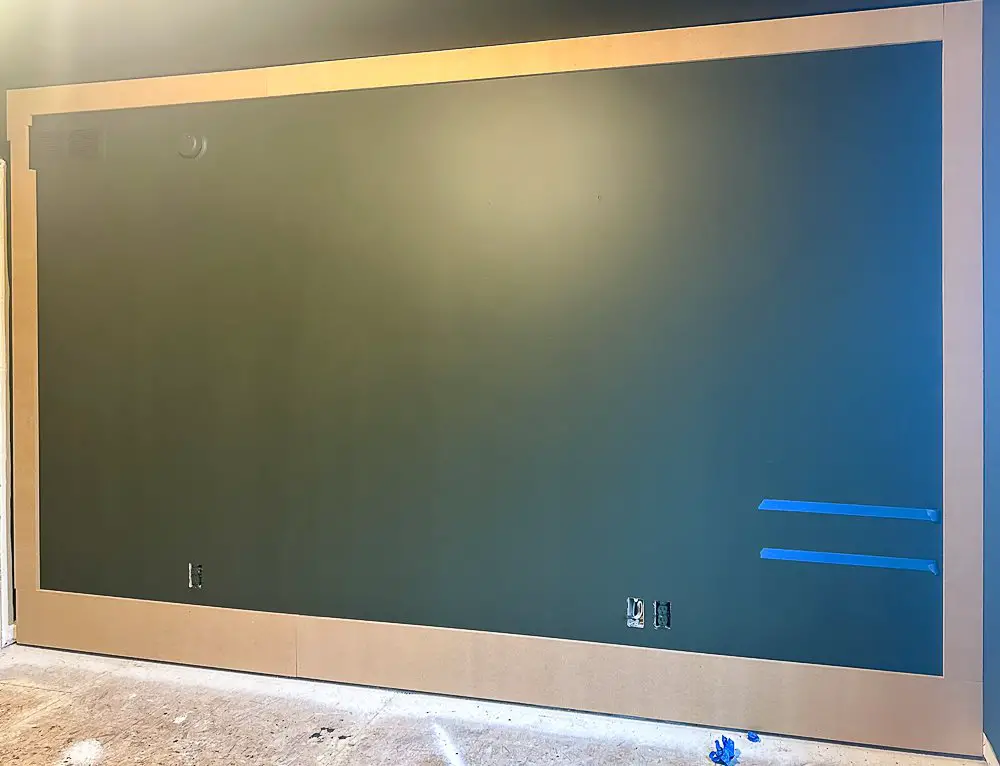
As you can see, I used painter’s tape to outline some of the design before starting. Like I said, I need to see it. Haha! I also used boards to get more of the full vision, before starting any of the project…
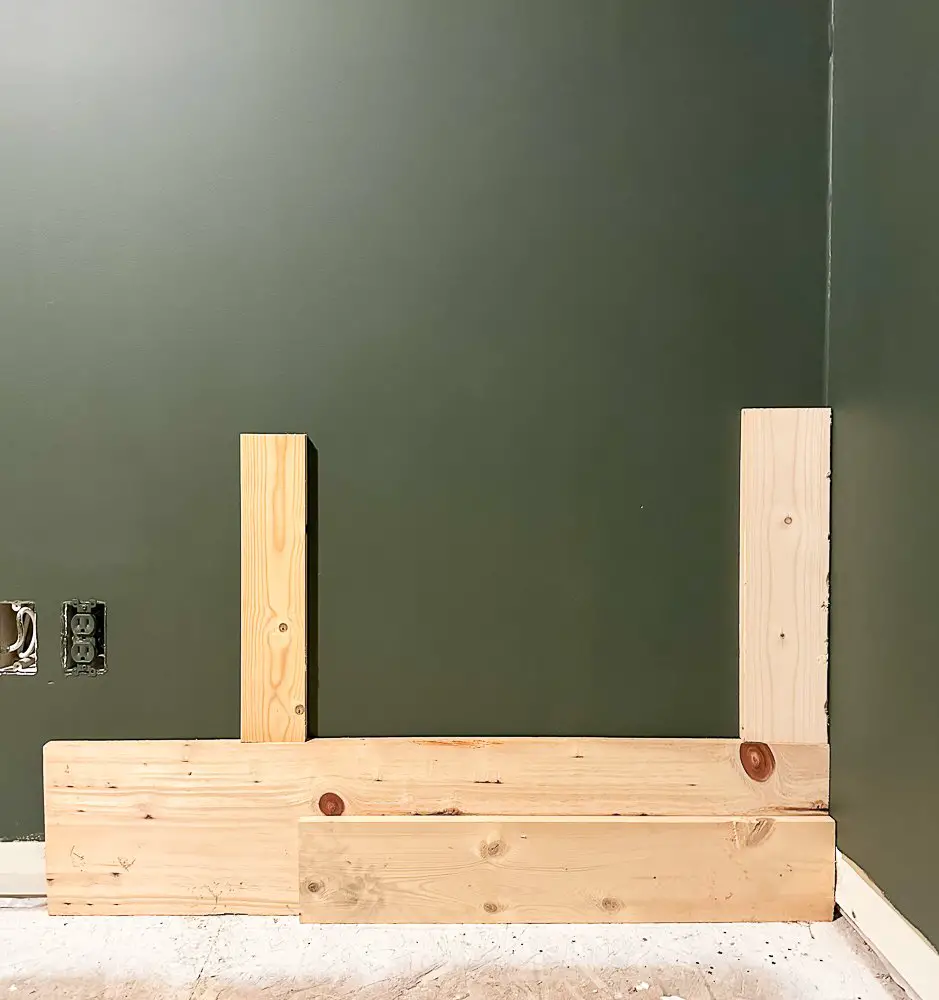
Note: I painted my walls before starting this project. This is not necessary. All of the painting can easily be done after the wall is finished.
Step Three: Dividing Board for DIY Moulding Accent Wall
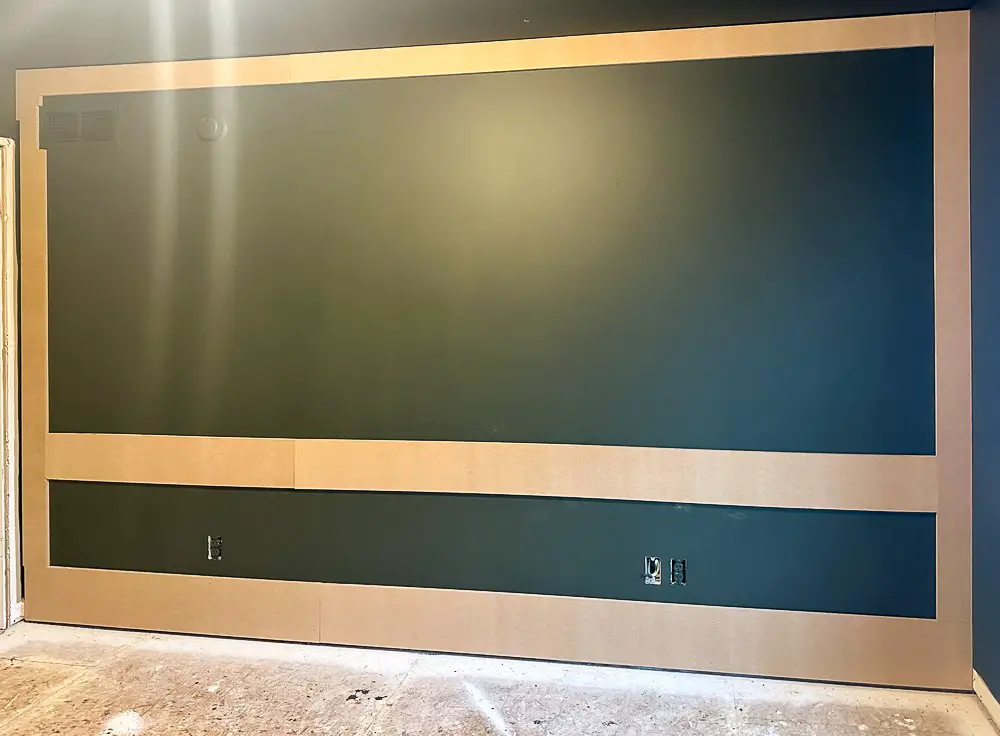
Now that we have the outline of our wall finished, we are ready to move onto the dividing board. For this long horizontal board, I ripped my MDF board to 8 inches wide and cut it to fit the length of the wall. Be sure to use a level to ensure your boards are straight.
Measuring up 15 inches from the top of my bottom (10″ wide) board, I attached this long horizontal board (2 of them actually, butted up together) using my nail gun…
Step Four: Bottom Boxes
At the start of this project, I had determined the number of boxes I wanted was 5. Now I needed to decide how wide I wanted each of my boxes to be. I played around with some different ideas. To do this, I cut 4 MDF strips. First, I ripped them to 3 1/2″ wide and then cut them to fit between my dividing board and bottom board. Approximately 15 inches.
Once I had my 4 trim pieces, I moved them around until I found a pattern and spacing I liked. I settled on the following, working left to right:
- Box 1: 24 inches wide
- Box 2: 14 1/4 inches wide
- Box 3: 51 7/8 inches wide
- Box 4: 24 inches wide
- Box 5: 14 1/4 inches wide
Using my level, I made sure each 15″ trim piece was straight. I then attached them in place, using my nail gun.

Step Five: Finishing the Boxes
Placing the rest of the trim boards is a breeze. Simply use your level to line up the bottom vertical pieces with the top vertical pieces and attach them. When finished, your design should look like this…

Step Six: Molding Strip
Cut a long strip of the Cove Moulding to fit across the full length of the dividing board. Attach this long strip in the center of the board, using a nail gun and 1-inch brad nails. Make sure to use a level to ensure it’s straight…

Step Seven: Picture Frame Molding
You’re now ready to move onto the part of this project that sets it apart from any other board and batten accent wall. The trim moulding.
I used Cove Moulding strips for my wall. You can find these at Menards, Home Depot, or any lumber store. If you can’t find this particular molding another similar style of moulding will work too.
To complete this part of the project, you’ll simply cut your moulding to fit up against each MDF trim piece. These are your border pieces. For the placement of the moulding, attach them using 1-inch nails in your nail gun…

You’ll need to cut the ends of these strips at a 45-degree angle so that they will match up together in the corners. This took a little bit of trial and error, but it wasn’t hard.
Here’s what the box will look like when finished…

Continue making your cuts and attaching the Cove strips to the bottom and top boxes…

Until they are all finished…

Step Eight: New Baseboard
Part of my project for this room was to remove baseboards. I knew I wanted to get rid of all of my builder-grade baseboards and replace them with chunkier, more substantial baseboards.
But even if I had stuck to the original baseboards, I still would have chosen to add a 6-inch baseboard to this accent wall. It just wouldn’t look finished with a skinny baseboard. Everything about this wall needs to make a statement.
At this stage, I was ready to complete the look with a second trim board. A 6-inch wide baseboard. I ripped the MDF board to 6 inches and cut it to fit the length of the wall.
Step Nine: Ready for the Finishing Touches
And now you’re ready for the good stuff. The last step to this beautiful custom look.
- Fill in all of the nail holes with wood filler.
- Hand sand them once the wood filler is dry.
- Caulk edges.
Once everything is dry, your beautiful new accent wall is ready for a fresh coat of paint. MDF absorbs paint. Therefore, you will most likely need 2-3 coats.
I chose Laurel Woods by Sherwin Williams for my accent wall. I kept all of the walls and even the ceiling one consistent color.
You can check out the full reveal of this room in this post.

After completing this project, I think this has officially become my favorite style of accent wall. I love how it elevates the space and makes it feel more refined and luxurious…
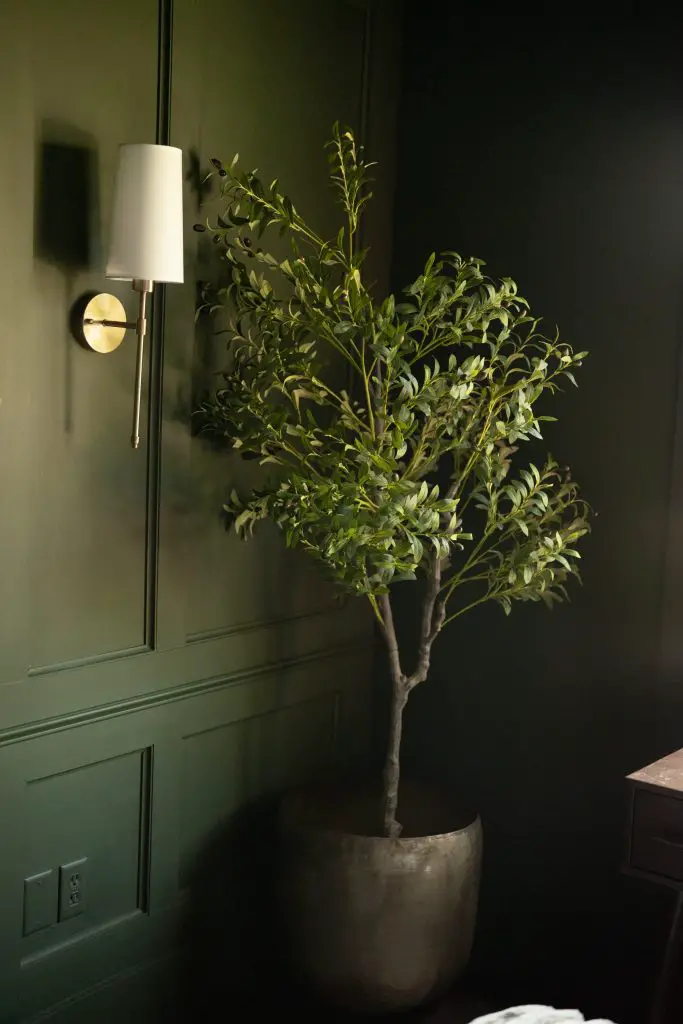
Those lights are perfect for this wall. And so easy to install! No wiring needed!! I love the gold against that dark, rich green.
Here’s the link for the lights, if you want to check them out.
I hope these step-by-step instructions have equipped you with everything you need to know to complete your own DIY accent wall.
As always, let me know if you have any questions. I love helping you turn these projects into something doable.
Designer Tip: When It Might Be Time to Bring in Help
If you’re working on your home and things still don’t feel quite right, you’re not alone. Many of our clients start exactly where you are now. They’ve gathered ideas, saved inspiration photos, and maybe even purchased a few pieces, but the space still doesn’t feel cohesive. That’s often the moment when having a designer can make all the difference. We help homeowners create a clear plan so every decision works together. From layout and furniture placement to finishes and lighting, the goal is a space that feels thoughtful, comfortable, and complete.
If you’d like a little guidance with your space, you can learn more about our interior design services below.
Explore Interior Design Services
Planning a kitchen, living room, or full home project? Start with a quick discovery call to see if we’re a good fit.
Until next time,
Happy Building, Friend!!
Be sure to join my VIP List below and never miss an upcoming post.
More Ways to Transform Boring Walls
Master Bedroom MCM Accent Wall


0 Comments